結論
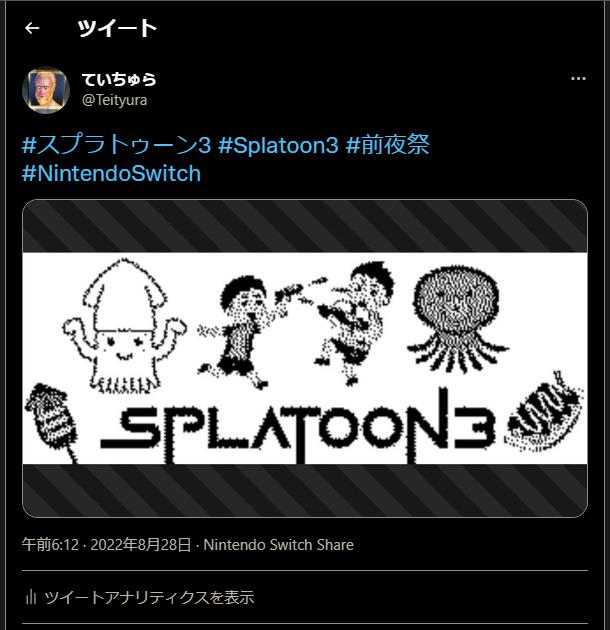
Splatoon3 でも投稿できました
Lolowebさんのリポジトリを使うことで、スプラ3でも投稿できます
- progmem / Switch-Fightstick | GitHub
- 一番ベースのリポジトリです
- shinyquagsire23 / Switch-Fightstick | GitHub
- progmemさんのリポジトリのフォークです
- 高速化などされており、ドット打ちが早く終わるようです
Loloweb / Switch-Fightstick | GitHub- shinyquagsire23さんのリポジトリのフォークです
- スプラ3にも対応しており、こちらのリポジトリを使います

概要
Arduino Uno R3 を使って、自動ドット打ちをして、
イラストを投稿する手順をまとめたメモになります
必要なもの
- Windows PC
- WSLを動かせる環境
- ELEGOO Arduino用UNO R3
- Amazonで2399円です、安い!https://www.amazon.co.jp/gp/product/B06Y5TBNQX
環境
- WSL2
- Ubuntu 18.04.6 LTS
- Python 2.7.17
登場人物
LUFA
マイコン用のライブラリです
Switch-Fightstick
Arduinoをポッ拳のコントローラとして認識させるソフトウェアのようです
pngをイラスト投稿できる形式に変換したりする機能を持ちます
LUFAを使用します
dfu-programmer
自動化プログラムをマイコンに書き込むためのソフトです
apt install dfu-programmer のように入れたり、
tar 形式で落として、ビルドして入れたり、
windows用のexeをダウンロードしたりできます
今回は exe を落としてきて Powershell で実行しました
準備
- WSL環境を用意して、Ubuntu 18.04.6 LTS をインストールする
- イラスト投稿する画像を用意する
- dfu-programmer.exe をダウンロードフォルダに入れておく
画像は 320 x 120 のサイズで用意して、
GMIP等の画像編集ソフトを使って 2値化 しておきます
dfu-programmerのバージョンは 0.7.0 でよいと思います
作業
必要パッケージのインストール
python2系で動作させました
apt-get update -y
apt install -y python2.7 make
apt install -y git gcc-avr avr-libc python-pil
必要リポジトリを入れる
Switch-Fightstick が1つ上の階層のLUFAディレクトリ(大文字)を参照するので、
git clone https://github.com/abcminiuser/lufa.git LUFA
のように ~/repos/ 以下に
Switch-Fightstickディレクトリ と
LUFAディレクトリ が存在している状態にします
mkdir -p ~/repos
cd ~/repos/
git clone https://github.com/abcminiuser/lufa.git LUFA
git clone https://github.com/Loloweb/Switch-Fightstick.git
cd Switch-Fightstick/
git checkout -b work-spla3
画像(wallpaper.png) をカレントディレクトリ に持ってくる
用意した画像をwsl環境に持ってきます
パスは、個人の環境に合わせて読み替えてください
cp /mnt/c/Users/<username>/Downloads/spla-images/wallpaper.png ./
ls -al wallpaper.png
TypeError対策
後述のようにエラーが出たので、int型にキャストさせます
vim png2c.py
git diff png2c.py
diff --git a/png2c.py b/png2c.py
index 56a1438..81a75ac 100644
--- a/png2c.py
+++ b/png2c.py
@@ -40,7 +40,8 @@ def main(argv):
          data.append(0 if im_px[j,i] == 255 else 1)

     str_out = "#include <stdint.h>\n#include <avr/pgmspace.h>\n\nconst uint8_t image_data[0x12c1] PROGMEM = {"
-    for i in range(0, round((320*120) / 8)): # for some reason, this is being interpreted as a float?
+    # for i in range(0, round((320*120) / 8)): # for some reason, this is being interpreted as a float?
+    for i in range(0, int(round((320*120)) / 8)):
        val = 0;

        for j in range(0, 8):
image.c を生成
png画像を image.c に変換します
python png2c.py wallpaper.png
MCU を変更
MCU が teensy というボードの番号になってるので、
Arduino の at90usb1286 に変更しておきます
vim makefile
git diff makefile
diff --git a/makefile b/makefile
index 9800976..10e60ae 100755
--- a/makefile
+++ b/makefile
@@ -12,7 +12,8 @@
 # Run "make help" for target help.

 # Set the MCU accordingly to your device (e.g. at90usb1286 for a Teensy 2.0++, or atmega16u2 for an Arduino UNO R3)
-MCU          = at90usb1286
+# MCU          = at90usb1286
+MCU          = atmega16u2
 ARCH         = AVR8
 F_CPU        = 16000000
 F_USB        = $(F_CPU)
ビルド
ビルドすると Joystick.hex というファイルができます
make
Joystick.hex をダウンロードフォルダにコピーする
wsl環境で生成した Joystick.hex を
windowsのホスト機の ダウンロードフォルダ にコピーします
cp ~/repos/Switch-Fightstick/Joystick.hex /mnt/c/Users/<username>/Downloads/
Joystick.hex を Arduino に書き込む
powershellで実行していきます
cd ./Downloads/
dfu-programmer.exe atmega16u2 erase
dfu-programmer.exe atmega16u2 flash Joystick.hex
dfu-programmer.exe atmega16u2 reset
ハマりポイント
dfu-programmer で Arduino に書き込めない
私は、ここで結構ハマってしまったのですが、
デバイスマネージャーを見て、自動でドライバーが入ってたら
一度削除 して dfu-programmerのパスを検索 して 手動でドライバーを適用 したら書き込めました
参考リンク(「無限ワット」自動周回プログラムの導入方法) の
ドライバーソフトウェアの更新の箇所を参考にしてみてください
dfu-programmer: no device present
TypeError
for i in range(0, round((320*120) / 8)): # for some reason, this is being interpreted as a float?
コメントにある通り、
roundの部分が float として解釈されるようで、
for i in range(0, int(round((320*120)) / 8)): のように
int にキャストしたら、エラーを吐かなくなりました
# python png2c.py wallpaper.png
TypeError: range() integer end argument expected, got float.

コメント